How to safely dim interior lights when door is open? To turn off interior lights when the door is open, you can adjust the settings in your vehicle’s interior light system. By following these steps, you can ensure that the lights are not left on unnecessarily, saving battery power.
First, locate the interior light switch, usually located near the dashboard or above the rearview mirror. Next, check if the switch has a “door” setting or a button labeled “off. ” Adjust the switch to the “door” setting or press the “off” button, which will enable the lights to turn off automatically when the door is open.
Double-check the settings to ensure they are enabled and functioning properly. This simple adjustment will ensure that the interior lights are not left on and draining the vehicle’s battery unnecessarily.
Understanding The Importance Of Dimming Interior Lights
Understanding the importance of dimming interior lights is crucial for energy conservation and maintaining a pleasant ambiance. Discover how to effortlessly turn off interior lights when the door is open, reducing unnecessary power usage and enhancing convenience in your home or vehicle.
When it comes to driving at night, one often overlooked but crucial aspect is the interior lights of a vehicle. Many people fail to realize the potential dangers these lights can pose if left on when the door is open.
Understanding the importance of dimming interior lights is essential for reducing distractions, preserving night vision, and enhancing overall safety.
Read More: 1998 Chevy Silverado heater control problems
The Role Of Dimming Interior Lights In Reducing Distraction And Preserving Night Vision
Dimming the interior lights when the door is open plays a vital role in reducing distractions for both the driver and passengers. Here’s why:
- Prevents glare: Dimming the interior lights helps minimize glare on the windshield, enhancing the driver’s visibility and reducing distractions caused by excessive brightness.
- Maintains night vision: By keeping the lights dim, your eyes can adjust to the darkness outside the vehicle more easily. This helps preserve your night vision, allowing you to see potential hazards on the road more clearly.
Enhancing Safety And Minimizing Potential Hazards
Dimming interior lights when the door is open is not just about reducing distractions; it is also crucial for enhancing safety and minimizing potential hazards. Consider the following:
- Avoiding blind spots: Bright interior lights can create blind spots for the driver, obstructing their view of the road and other vehicles. Dimming the lights eliminates this risk, ensuring better visibility at all times.
- Alerting other drivers: When you leave your vehicle parked and the doors open at night, dimming the interior lights ensures that other drivers are not mistakenly alerted by an overly bright vehicle interior. It helps prevent unnecessary distractions or potential accidents caused by the mistaken perception of a moving vehicle.
Benefits Of Dimming Interior Lights When The Door Is Open
Dimming the interior lights when the door is open offers several benefits, promoting a safer and more pleasant driving experience:
- Energy conservation: Dimming the lights conserves energy, extending the life of the vehicle’s battery.
- Increased privacy: Dimming the interior lights helps maintain privacy when parked at night, reducing the chances of unwanted attention or potential break-ins.
- Night-time comfort: A dimly lit interior provides a more comfortable ambience during night-time drives, making it easier for occupants to relax and enjoy the journey.
By understanding the importance of dimming interior lights, you can reduce distractions, preserve night vision, enhance safety, and enjoy a more comfortable and secure driving experience. Keep in mind the numerous benefits that dimming the lights bring, and always remember to switch them off when the door is open.
Read More: Lincoln Mkz Panoramic Roof Problems and Fixing Way

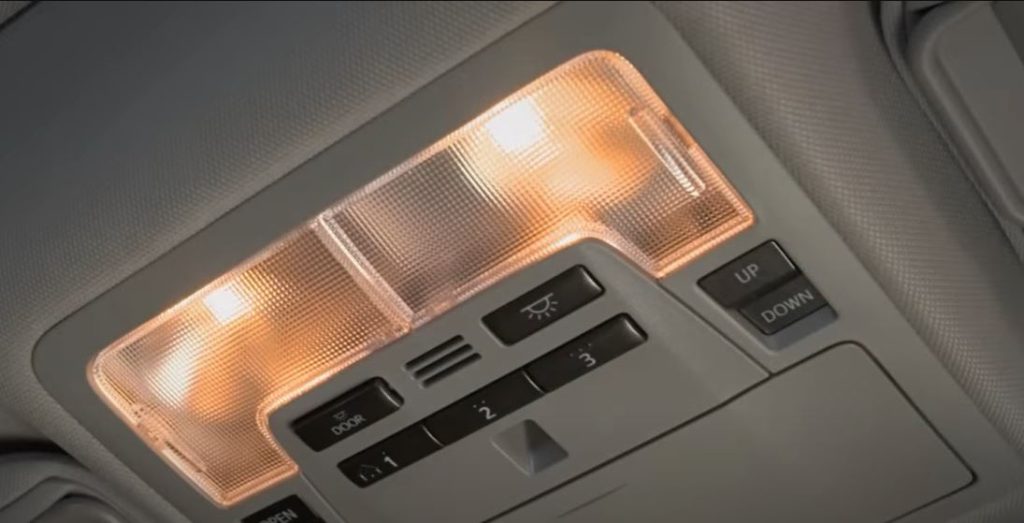
Credit: m.youtube.com
Choosing The Right Dimming Method
Choosing the right dimming method for turning off interior lights when the door is open can be a crucial decision. With various options available, it’s essential to consider factors like functionality, energy efficiency, and convenience to find the perfect solution that suits your needs.
When it comes to turning off interior lights when the door is open, choosing the right dimming method is crucial. There are several options available, each with its own advantages and disadvantages. Evaluating and selecting the right dimming solution involves considering various factors to ensure the best fit for your needs.
Evaluating Different Dimming Options:
- Switch-based dimming: This method involves installing a switch that automatically turns off the interior lights when the door is open. The switch is connected to the door sensor, triggering the lights to dim or turn off when the door is opened.
- Timer-based dimming: With this option, a timer is set up to automatically dim or turn off the interior lights after a specified period of time when the door is open. This method allows for customization of the duration based on your preferences.
- Motion sensor dimming: Using motion sensors, this dimming method detects movement within a specified range. When the door is open and motion is detected, the lights automatically dim or turn off. This option is energy-efficient and convenient.
- Smart home automation: Smart home automation systems offer advanced dimming capabilities, allowing you to control the lights remotely via a smartphone app. These systems can be programmed to dim or turn off the lights when the door is open and offer additional features for seamless integration with other smart devices.
Advantages And Disadvantages Of Each Method:
Switch-based dimming
- Advantages:
- Simple and cost-effective solution.
- Requires minimal installation and setup.
- Disadvantages:
- Limited customization options.
- Manual operation may be inconvenient.
Timer-based dimming
- Advantages:
- Allows customization of the duration for the lights to dim or turn off.
- Provides flexibility to adjust based on specific needs.
- Disadvantages:
- Requires initial setup and programming.
- May not be suitable for situations where the duration varies.
Motion sensor dimming
- Advantages:
- Energy-efficient as it only activates when motion is detected.
- Offers convenience by automatically dimming or turning off the lights.
- Disadvantages:
- Installation and calibration of the motion sensors are required.
- In some cases, false triggers may occur.
Smart home automation
- Advantages:
- Provides remote control and customization options.
- Offers integration with other smart devices for enhanced functionality.
- Disadvantages:
- Typically a more expensive solution.
- Requires initial setup and configuration.
Factors To Consider When Selecting A Dimming Solution:
- Budget: Evaluate the cost of installation, equipment, and ongoing maintenance associated with each dimming method.
- Convenience: Consider the level of automation and ease of operation provided by each method.
- Customization: Determine if the dimming solution allows for customization based on your specific preferences and needs.
- Energy efficiency: Assess the energy-saving capabilities of the dimming method to reduce electricity consumption.
- Integration: If desired, check if the dimming method can integrate with other smart home devices.
- Reliability: Ensure the dimming solution is reliable and functions consistently without frequent glitches.
- Compatibility: Verify that the chosen dimming method is compatible with your existing lighting fixtures and home wiring.
Carefully evaluating and selecting the right dimming method ensures efficient and convenient control of your interior lights when the door is open. Take into account your priorities, budget, and desired level of automation to make an informed decision for an optimal dimming solution.
Installing Dimmer Controls
Install dimmer controls to easily turn off interior lights when the door is open. This simple solution improves energy efficiency and adds convenience to your home.
Steps To Install Aftermarket Dimmer Controls:
- Remove the old interior light switch: Start by disconnecting the negative battery terminal to ensure safety. Remove the screws holding the switch in place and carefully detach the wiring harness.
- Prepare the new dimmer controls: Choose a compatible aftermarket dimmer switch for your car model. Ensure that it is designed to work with the interior lights and has the necessary wiring connections.
- Connect the wires: Match the wires from the new dimmer switch to the corresponding wires in your car’s wiring harness. Use wire connectors or soldering to create secure connections.
- Mount the new dimmer switch: Position the new dimmer switch in the desired location and secure it using the provided screws. Make sure it is easily accessible and within reach when the door is open.
- Reconnect the negative battery terminal: Once the new dimmer switch is securely installed, reconnect the negative battery terminal to restore power.
Compatible Dimmer Controls For Different Car Models:
- Universal aftermarket dimmer switches: These dimmer controls are designed to work with a range of car models and can be adjusted to fit most interiors. They offer versatility and ease of installation.
- Model-specific dimmer switches: Some car manufacturers offer dimmer controls specifically designed for their models. These switches may provide seamless integration with the interior lighting system and offer precise control.
Best Practices For Installation And Wiring:
- Read the instructions: Before starting the installation process, carefully read the instructions provided with the aftermarket dimmer switch. Familiarize yourself with the specific requirements and recommendations.
- Follow wiring diagrams: If available, consult the wiring diagram for your car model to ensure proper connection of the dimmer switch wires to the corresponding wires in the wiring harness.
- Securely mount the dimmer switch: Choose a location that is easily accessible and within reach when the door is open. Ensure the switch is firmly mounted to prevent vibration or movement while driving.
- Test the functionality: After installation, test the new dimmer switch to ensure it operates as intended. Turn on the interior lights and open the door to verify that the lights dim or turn off as desired. Make any necessary adjustments if the function is not working correctly.
- Seek professional assistance if needed: If you are unsure about any aspect of the installation or encounter difficulties, it is recommended to consult a professional or seek guidance from knowledgeable individuals to avoid any potential damage.
Remember, installing dimmer controls for your car’s interior lights can enhance convenience, create a cozy ambiance, and prolong the life of the bulbs. Take the time to choose compatible dimmer switches, follow the installation steps diligently, and adhere to best practices for a successful modification.
Adjusting Factory Dimming Settings
Learn how to adjust your factory dimming settings to turn off interior lights when the door is open. Find out the step-by-step process to efficiently control the lighting in your vehicle for a more convenient and personalized experience.
When it comes to interior lights of your vehicle, adjusting the factory dimming settings can enhance your driving experience. Explore the default settings of the interior lights to understand how they work and then customize the dimming options according to your preferences.
If necessary, you can even reset the dimming settings to their default configuration. Let’s dive into each aspect in detail:
Exploring The Default Settings Of Interior Lights:
- The default dimming settings of the interior lights may vary depending on the make and model of your vehicle.
- Some vehicles have a default configuration where the interior lights automatically turn on when the doors are opened.
- The default dimming levels are set to a moderate brightness, providing adequate visibility without being too harsh.
- Additionally, some vehicles offer a timed delay feature, which gradually dims the lights after a certain period of time to conserve battery life.
Customizing The Dimming Options In Factory Settings:
- To customize the dimming options, locate the settings menu on your vehicle’s console or dashboard.
- Access the interior lighting settings through this menu and navigate to the dimming options.
- Within the dimming options, you’ll typically find settings to adjust the brightness levels of the interior lights.
- You may have the flexibility to choose from a range of dimming levels, allowing you to set the lights to your preferred brightness.
- Some vehicles even offer the option to customize different dimming levels for specific areas, such as the front and rear interior lights.
How To Reset The Dimming Settings To Default If Necessary:
- If you’ve made custom dimming adjustments and wish to revert to the factory settings, resetting the dimming settings is a simple process.
- Access the settings menu on your vehicle’s console or dashboard.
- Locate the interior lighting settings within the menu and navigate to the dimming options.
- Look for the option to reset or restore the dimming settings to their default configuration.
- Select this option and confirm your choice to reset the dimming settings.
- Once the settings are reset, the interior lights will return to their default dimming levels as per the factory settings.
Remember, customizing the dimming settings can enhance the comfort and ambiance of your vehicle’s interior. Whether you prefer a brighter or dimmer environment, exploring and adjusting the factory dimming settings allows you to tailor the interior lights to your liking.
Identifying Door Trigger Wires
To turn off interior lights when the door is open, it’s important to identify the door trigger wires. By following the provided instructions carefully, you can easily locate and disable these wires, ensuring the lights don’t stay on unnecessarily.
Locating The Door Trigger Wires In The Vehicle:
- Start by identifying the interior light circuit in your vehicle. The easiest way to do this is by consulting the owner’s manual or looking up the wiring diagram online.
- Once you have located the interior light circuit, find the wire that connects the door switch to the interior lights. This wire is known as the door trigger wire.
- Depending on the make and model of your vehicle, the door trigger wire might be of a specific color, or it may have a specific label or marking.
- In most vehicles, the door trigger wire is located in the driver’s side kick panel or under the dashboard. Look for a bundle of wires with connectors, and trace them back to the door switch.
Different Methods To Identify The Correct Wires For Dimming:
- Inspect the wires visually: Look for wires that are connected to the door switch and lead to the interior lights. These wires are likely the door trigger wires you are looking for.
- Use a wire tracer tool: A wire tracer tool can help you identify the door trigger wires by emitting a signal that can be detected by a receiver. This tool makes the identification process faster and more accurate.
- Consult a wiring diagram: If you have access to a wiring diagram for your specific vehicle model, it can provide detailed information about the wiring connections, including the door trigger wires.
Tips For A Safe And Accurate Wire Identification Process:
- Always disconnect the vehicle’s battery before working with any electrical wiring to avoid the risk of electrical shock or damage to the vehicle’s components.
- Use a multimeter: A multimeter can help you test the voltage and continuity of the wires, allowing you to confirm if you have identified the correct door trigger wires.
- Double-check your identification: Once you think you have found the door trigger wires, double-check by opening and closing the door. If the interior lights turn on and off as expected, you have likely identified the correct wires.
- Take your time: Do not rush the wire identification process. Take your time to ensure that you have correctly identified the door trigger wires before making any modifications.
Remember, when working with electrical systems in your vehicle, it is always a good idea to consult a professional if you are unsure or uncomfortable performing the task yourself. Safety should always be a top priority.
Wiring Dimmer Controls To Door Trigger Wires
Learn how to wire dimmer controls to door trigger wires in order to automatically turn off interior lights when a car door is opened. With these simple steps, you can ensure that your lights are only on when you need them, saving energy and prolonging battery life.
Step-By-Step Guide On Connecting Dimmer Controls To Door Trigger Wires:
- Start by identifying the door trigger wires in your vehicle. These wires are usually located in the door jamb or near the hinge. Refer to your vehicle’s wiring diagram or consult a professional if you are unsure.
- Once you have identified the door trigger wires, you will need to connect them to the dimmer controls. This can be done using wire connectors or soldering the wires together. Ensure that the connections are secure and free from any loose ends.
- Proper placement and routing of wires are crucial to ensure functionality and safety. Make sure to route the wires away from any moving parts or potential hazards. Secure them using zip ties or clips to keep them in place and prevent them from interfering with other components.
- It is essential to follow proper wiring techniques to minimize potential interference or damage. Avoid running the wires near high-powered electrical components or speakers to prevent any audio or electrical issues. Keep the wires away from heat sources or sharp edges to avoid potential damage.
- Once you have connected the dimmer controls to the door trigger wires and routed them properly, test the functionality. Open and close the door to see if the interior lights turn on and off accordingly. Make any necessary adjustments or repairs if the lights do not respond as expected.
- Always prioritize safety when working with electrical components. Disconnect the vehicle’s battery before starting any wiring work and ensure that all connections are secure and insulated to avoid any short circuits or electrical hazards.
Proper Placement And Routing Of Wires To Ensure Functionality And Safety:
- Ensure that the wires are placed and routed in a way that does not obstruct any other components or moving parts within the vehicle.
- Use zip ties or clips to secure the wires along their path and prevent them from hanging loosely or getting tangled.
- Avoid running the wires near high-powered electrical components or speakers to minimize the risk of interference or audio issues.
- Keep the wires away from heat sources, sharp edges, or any potential hazards that may cause damage or wear over time.
- Test the functionality and make adjustments if necessary, ensuring that the wires are properly installed and do not cause any issues.
Wiring Techniques To Minimize Potential Interference Or Damage:
- Avoid running the wiring alongside high-powered electrical components or audio systems to minimize the risk of interference or audio disturbances.
- Use shielded wire or twisted pair cables to reduce the effects of electromagnetic interference (EMI) from other electrical components.
- Insulate the wire connections properly using electrical tape or heat shrink tubing to prevent any short circuits or electrical hazards.
- Route the wires away from heat sources or sharp edges to avoid potential damage to the insulation or wire integrity.
- Test the wiring installation and functionality, ensuring that it operates without any interference or malfunctions.
Remember to follow these step-by-step instructions and wiring techniques to effectively connect dimmer controls to door trigger wires. Proper placement and routing of wires will ensure both functionality and safety.
Testing And Fine-Tuning The Dimming Setup
Easily control your interior lights by testing and fine-tuning the dimming setup. Turn off the lights when the door is open for added convenience and energy savings.
Verifying the correct installation of dimming controls and wiring:
- Ensure that the dimming controls and wiring are installed correctly to avoid any malfunction. Follow these steps for verification:
- Check the connections between the dimming controls and the lighting system to ensure they are secure.
- Test the dimming controls by turning on and off the lights using the controls.
- Verify that the dimming controls are compatible with the type of lights being used.
Adjusting the dimming settings to achieve the desired brightness levels:
- Once the correct installation is confirmed, it’s time to fine-tune the dimming settings for optimal performance. Here’s how:
- Start by setting the dimming controls to the lowest level and observe the brightness of the lights.
- Gradually increase the dimming level until the desired brightness is achieved.
- Take note of any changes in the lighting quality or flickering during the adjustment process.
Troubleshooting common issues and ensuring optimal performance:
- Despite proper installation and adjustment, issues may still arise. Here are some troubleshooting tips:
- If the lights flicker or dim inconsistently, check the wiring connections to ensure there are no loose or damaged wires.
- Adjust the dimming controls to see if the issue persists. Sometimes, minor adjustments can resolve flickering or inconsistent dimming.
- If troubleshooting steps do not resolve the issues, consult a professional electrician for further assistance.
Remember, testing and fine-tuning the dimming setup is crucial to achieving the desired lighting experience in your interior space. By verifying the correct installation, adjusting the dimming settings, and troubleshooting common issues, you can optimize the performance and enjoy the benefits of controlled lighting levels.
Safety Considerations And Precautions
Learn how to safely turn off interior lights when the door is open to avoid draining your car battery. Implementing these simple precautions can help prevent accidents and save energy.
When it comes to installing a dimming system for your interior lights that automatically turns off when the door is open, there are a few safety considerations and precautions to keep in mind. These guidelines will ensure that the installation process is done correctly and reduce any potential risks.
Here is what you need to know:
Safety Precautions To Follow During The Dimming Installation Process:
- Prior to starting the installation, ensure that all power sources are turned off and unplugged to prevent any electrical accidents.
- Make sure to wear appropriate safety gear, such as gloves and safety glasses, to protect yourself from any potential injuries.
- Familiarize yourself with the user manual and installation instructions provided by the manufacturer to understand the proper wiring and installation procedures.
- If you are not confident in your electrical skills, it is recommended to hire a professional electrician to perform the installation.
Potential Risks And How To Mitigate Them:
- Electrical hazards: The most significant risk associated with installing a dimming system is electrical shock or fire. To mitigate this risk, follow local electrical codes and regulations, and ensure that all wiring is properly grounded and insulated.
- Incorrect installation: Mistakes during the installation process can lead to malfunctioning of the dimming system or damage to other electrical components. Double-check all connections and wiring to ensure they are correct and secure.
- Compatibility issues: Ensure that the dimming system you choose is compatible with the type of lights you have installed in your interior. Using an incompatible system can damage your lights or cause them to flicker.
- Light flickering or buzzing: Improper installation or faulty components can result in lights flickering or emitting a buzzing noise. Regularly inspect and maintain the system to identify and address these issues promptly.
Regular Maintenance And Inspection Of Dimming Components:
- Conduct routine inspections of the dimming system to ensure its proper functioning and identify any signs of damage or wear.
- Clean the dimming components regularly to remove dust or debris that can interfere with their performance.
- Check all connections and wires periodically to ensure they are secure and free from any signs of damage.
- Follow the manufacturer’s recommended maintenance schedule, including any software updates or component replacements.
By following these safety precautions and regularly maintaining the dimming system, you can ensure a safe and efficient operation of your interior lights. Keep in mind that if you have any doubts or concerns during the installation process, it is always best to seek professional assistance from a qualified electrician.
Tips For Optimal Dimming Experience
To optimize your dimming experience, learn how to automatically turn off interior lights when the door is open. This helpful tip ensures energy efficiency and convenience in your home.
Maximizing The Benefits Of Dimming Interior Lights:
- Adjust the dimming level: Experiment with different dimming levels to find the one that suits your preferences and enhances your overall driving experience. A lower dimming level can create a cozy and relaxing ambience, while a higher level provides more visibility.
- Sync with the dashboard lights: Coordinate the dimming level of your interior lights with the brightness of your dashboard lights. This synchronization helps maintain consistent lighting throughout your vehicle and reduces eye strain while driving at night.
- Utilize ambient light sensors: Some vehicles are equipped with ambient light sensors that automatically adjust the dimming level based on external light conditions. Take advantage of this feature to ensure optimal brightness at all times.
- Consider LED bulbs: LED bulbs not only consume less energy but also offer better dimming performance. They provide smooth and flicker-free dimming, allowing you to achieve the desired lighting ambiance without any interruptions or delays.
Additional Accessories Or Modifications To Enhance The Dimming Effect:
- Install dimmable LED light strips: If you want to further enhance the dimming effect or add a touch of personalization to your vehicle, consider installing dimmable LED light strips. These can be placed along the interior of your car and controlled to match your desired dimming level.
- Invest in aftermarket dimming modules: For vehicles that do not have built-in dimming capabilities, aftermarket dimming modules can be added to enable the dimming feature. These modules are often adjustable, allowing you to fine-tune the dimming level according to your preferences.
- Upgrade your interior lighting system: Upgrading your vehicle’s interior lighting system to one that specifically supports dimming can significantly enhance your dimming experience. Look for lighting kits or bulbs that are compatible with dimming functions to achieve optimal results.
Common Mistakes To Avoid And Tips For Troubleshooting:
- Avoid over-dimming: Dimming your interior lights too much can compromise visibility and safety while driving. Always ensure that you still have clear visibility of essential controls and gauges.
- Check your door switch: If you are facing difficulties in turning off the interior lights when the door is open, the issue might lie with the door switch. This switch is responsible for activating the dimming feature when the door is open. Inspect the switch and ensure it is functioning correctly.
- Verify your light bulb connections: Loose or faulty connections between the light bulbs and their sockets can cause flickering or inconsistent dimming. Regularly check the connections and replace any damaged bulbs or sockets to maintain optimal dimming performance.
- Consult your vehicle’s manual: If you are unsure about how to adjust the dimming settings of your interior lights or encounter any specific issues, refer to your vehicle’s manual. It provides detailed instructions and troubleshooting tips tailored to your vehicle’s make and model.
Frequently Asked Questions Of How To Turn Off Interior Lights When Door Is Open
How Do I Turn Off The Light When My Car Door Opens?
To turn off the light when your car door opens, simply locate the light switch and flip it.
How Do You Turn On Interior Lights When Door Is Open?
To turn on interior lights when the door is open, simply locate the light switch near the door frame and switch it on.
Why Is There A Light When The Door Is Open In My Car?
The light in your car turns on when the door opens to help you see inside.
Why Aren T My Interior Lights Coming On When I Open The Door?
If your interior lights aren’t coming on when you open the door, it could be due to a blown fuse or a faulty door switch. Check the fuse box and inspect the door switch for any issues.
Conclusion
Turning off the interior lights when the door is open is a simple yet often overlooked step that can have a big impact on both the environment and your vehicle’s battery life. By following the steps outlined in this blog post, you can ensure that your interior lights are not left on unintentionally, thus conserving energy and minimizing the risk of a dead battery.
Remember to always check your vehicle’s manual for specific instructions and recommendations. Making this small change to your routine can make a big difference in the long run. So, take a moment to familiarize yourself with the process and incorporate it into your daily habits.
It’s a small action that can contribute to a greener and more efficient lifestyle.
Hi, my name is Michel Luther. I am the owner of smartautohq.com website. I have been working in the automotive industry, especially in the car part nearly 7 years. So, I want to help you with this matter whatever I know