Why do 1998 Chevy Silverado heater control problems occur? The 1998 Chevy Silverado may experience heater control problems, which can affect heating performance. These issues can be caused by a faulty heater control valve or a malfunctioning blend door actuator.
This article helps you to find out the exact reasons and also helps you to get the best solutions. So, stay connected to get detailed answers about this matter.
Common Heater Control Problems
1998 Chevy Silverado heater control problems can be frustrating, causing issues such as malfunctioning temperature control, blower motor failure, or stuck vents. Ensure a comfortable ride by addressing these common heater control issues promptly.
If you own a 1998 Chevy Silverado, you may have encountered some frustrating heater control problems. When the temperature inside your truck doesn’t stay consistent or the blower motor malfunctions, it can make for an uncomfortable driving experience. In this section, we will discuss the common heater control problems that Silverado owners face and some possible causes for these issues.
Read More: Lincoln mkz panoramic roof problems
Faulty Temperature Control:
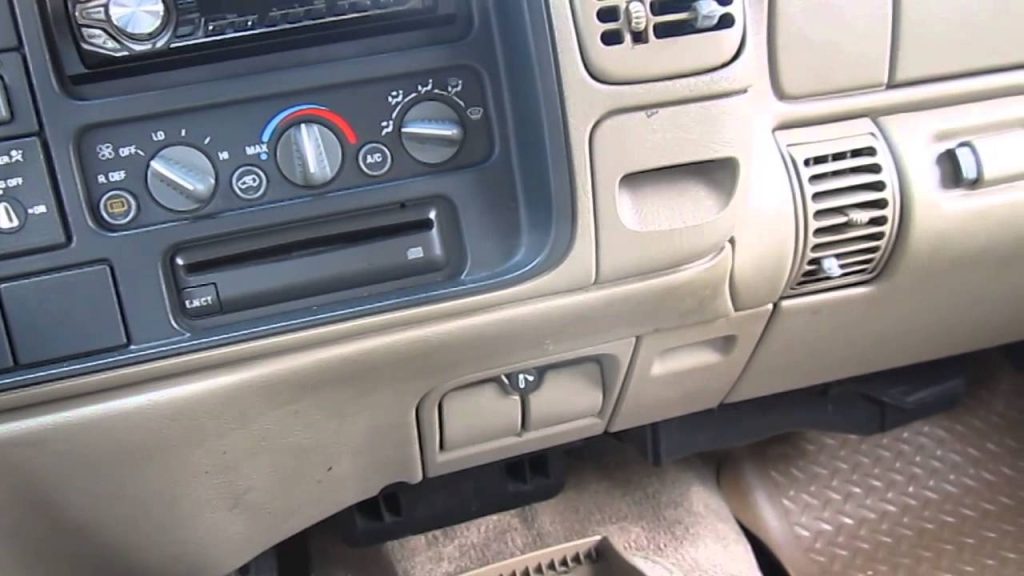
- Temperature control knob not working: If you find that adjusting the temperature control knob has no effect on the air temperature, it could be due to a faulty control module. The module may need to be replaced for the temperature control to function properly.
- Inaccurate temperature readings: Another common issue is when the temperature readings on the control panel do not accurately reflect the actual temperature inside the cabin. This could be caused by a malfunctioning temperature sensor or a faulty connection.
Inconsistent Hot And Cold Air:
- Heater blowing hot air only: If your Silverado’s heater is only blowing hot air, regardless of the temperature control settings, it could be due to a malfunctioning blend door actuator. The actuator controls the mix of hot and cold air, and if it fails, the heater may get stuck on the hot setting.
- Heater blowing cold air only: On the other hand, if you’re only getting cold air from the heater, even when the temperature control is set to high, it could indicate a problem with the blend door actuator getting stuck in the cold position.
Blower Motor Malfunction:
- Weak airflow: If the blower motor is not running at full capacity, you may notice weak airflow from the vents. This could be caused by a worn-out blower motor or a faulty blower motor resistor. Replacing the motor or the resistor may be necessary to restore proper airflow.
- No airflow: In some cases, the blower motor may not work at all, resulting in no airflow from the vents. This could be due to a blown fuse, a malfunctioning blower motor relay, or a faulty blower motor itself. Troubleshooting these components can help identify the root cause.
Remember, diagnosing and repairing heater control problems can be complex, so it’s always recommended to consult a professional mechanic for assistance if you’re not familiar with automotive electrical systems. Taking proper care of your Chevy Silverado’s heater control system ensures a comfortable driving experience, especially during cold weather.
Read More: What are Lexus door lock problems? Reasons & Solutions
Troubleshooting Tips For Temperature Control Problems
Having trouble with the temperature control in your 1998 Chevy Silverado? Follow these simple troubleshooting tips to resolve heater control problems efficiently.
If you’re experiencing issues with the temperature control in your 1998 Chevy Silverado, don’t worry! We’ve got some troubleshooting tips to help you get to the bottom of the problem. Follow these steps to potentially fix the temperature control problems and enjoy a comfortable driving experience once again.
Check Thermostat Settings:
- Ensure that the thermostat is set to the desired temperature.
- Make sure the thermostat is functioning properly and not stuck in one position.
- Verify that the control knobs or buttons for temperature adjustment are working correctly.
Inspect Temperature Control Unit:
- Check for any loose connections or disconnected wires in the temperature control unit.
- Examine the control unit for any signs of damage or corrosion.
- Clean the control unit’s contacts to ensure proper communication.
Test Heater Core Valve:
- Locate the heater core valve and inspect it for any signs of damage or blockage.
- Test the valve’s functionality by opening and closing it manually.
- Ensure that the valve is receiving proper signals from the temperature control unit.
Remember to address these troubleshooting tips in the order provided, as it could help you narrow down and pinpoint the specific issue with your Chevy Silverado’s temperature control. By following these steps and potentially resolving the problem on your own, you can save time and money by avoiding unnecessary trips to the mechanic.
Drive comfortably and confidently with a properly functioning temperature control system.
Troubleshooting Tips For Inconsistent Air Temperature
Get your 1998 Chevy Silverado heater control problems under control with these troubleshooting tips to address inconsistent air temperature. Keep your cabin comfortable by following these guidelines and resolving the issue.
Is the air temperature in your 1998 Chevy Silverado fluctuating? Dealing with inconsistent air temperature can be frustrating, especially when you’re counting on your heater to keep you warm during those chilly winter drives. Fortunately, there are some troubleshooting steps you can take to identify and address the issue.
In this section, we’ll explore three possible causes of inconsistent air temperature and provide tips for resolving them.
Check Blend Door Actuator:
- Inspect the blend door actuator for any signs of damage or malfunction.
- Ensure that the actuator is properly connected and not loose.
- If the actuator is faulty, consider replacing it with a new one.
- Make sure the actuator is receiving power and functioning correctly.
Inspect Heater Core For Leaks:
- Check for any visible signs of coolant leakage around the heater core.
- Look for wet spots or strong coolant odors inside the vehicle.
- If there are any leaks, repair or replace the heater core as necessary.
- Regularly maintain the coolant system to prevent future leaks.
Test The Hvac Control Module:
- Examine the HVAC control module for any faults or malfunctions.
- Use a diagnostic tool or consult a professional to test the module’s functionality.
- Ensure that all control settings are correctly calibrated.
- If needed, consider recalibrating or replacing the HVAC control module.
Troubleshooting inconsistent air temperature in your 1998 Chevy Silverado requires attention to detail and proper diagnosis. By checking the blend door actuator, inspecting the heater core for leaks, and testing the HVAC control module, you can potentially resolve the issue and enjoy consistent air temperature in your vehicle.
Remember to follow the recommended steps carefully and consult a professional if needed. Stay warm and comfortable on the road!
Troubleshooting Tips For Blower Motor Malfunction
Having trouble with your 1998 Chevy Silverado heater control? Check out these troubleshooting tips for blower motor malfunction to regain control of your vehicle’s heating system.
If you’re experiencing heater control problems in your 1998 Chevy Silverado, specifically issues with the blower motor, there are several troubleshooting tips you can try before taking it to a professional. Below, we will outline three important areas to inspect when diagnosing blower motor malfunctions.
Inspect Blower Motor Resistor:
- Begin by locating the blower motor resistor, which is typically found underneath the dashboard on the passenger side.
- Remove the resistor and visually inspect it for any signs of damage, such as burned or melted areas.
- Check the resistance of the resistor using a multimeter. It should have a specific resistance value according to your vehicle’s specifications. If the resistance is outside the recommended range, the resistor may need to be replaced.
Check Blower Motor Relay:
- Locate the blower motor relay, which is usually in the engine compartment’s fuse box.
- Remove the relay and inspect it for any signs of damage or corrosion.
- Test the relay using a multimeter or by swapping it with another relay of the same type in the fuse box to see if the blower motor starts functioning properly.
Test Blower Motor Speed Switch:
- Start by removing the control panel to access the blower motor speed switch.
- With the ignition on and the blower switch set to the highest speed, use a multimeter to test each terminal on the switch. Ensure that there is continuity between the appropriate terminals for each blower speed setting. If there is no continuity for any positions, the switch may need to be replaced.
- Additionally, inspect the wiring and connectors related to the blower motor speed switch for any damage or loose connections.
By following these troubleshooting tips, you may be able to identify and resolve the blower motor malfunction in your 1998 Chevy Silverado. If the issue persists or you need assistance, it is recommended to consult a professional mechanic with expertise in automotive heater control systems.
Diy Solutions For Common Heater Control Problems
Discover DIY solutions to common heater control problems in your 1998 Chevy Silverado. Fix issues like temperature control malfunctions with these easy, step-by-step tips and save on costly repairs.
Is your 1998 Chevy Silverado experiencing heater control problems? Don’t fret! There are several do-it-yourself solutions to address these issues. In this section, we will explore three common heater control problems and provide step-by-step instructions to tackle each one. Whether you need to replace the temperature control unit, repair the blend door actuator, or flush and replace the heater core, we’ve got you covered.
Replacing Temperature Control Unit:
- Disconnect the negative battery cable and wait for a few minutes to discharge any residual power.
- Remove the dash bezel or trim panel to access the heater control unit.
- Disconnect the electrical connectors from the temperature control unit.
- Remove the screws or bolts securing the unit in place.
- Install the new temperature control unit and secure it with screws or bolts.
- Reconnect the electrical connectors and the negative battery cable.
- Test the heater control to ensure it’s functioning properly.
Repairing Blend Door Actuator:
- Locate the blend door actuator, typically located behind the dashboard on the passenger side.
- Disconnect the electrical connector from the actuator.
- Remove the screws or clips securing the actuator in place.
- Gently pull the actuator out and inspect it for any signs of damage or failure.
- If necessary, replace the actuator with a new one.
- Reinstall the actuator, securing it with screws or clips.
- Reconnect the electrical connector.
- Test the heater control to verify proper functionality.
Flushing And Replacing Heater Core:
- Drain the coolant from the radiator by opening the drain valve.
- Locate the heater core, usually found behind the dashboard.
- Disconnect the heater hoses from the inlet and outlet ports of the heater core.
- Use a garden hose to flush the heater core in both directions, removing any debris or buildup.
- If the heater core is severely clogged or damaged, replace it with a new one.
- Connect the heater hoses back to the inlet and outlet ports of the new heater core.
- Refill the radiator with fresh coolant and bleed any air from the system.
- Test the heater control to ensure proper heat output.
By following these DIY solutions, you can address common heater control problems in your 1998 Chevy Silverado. Remember to proceed with caution and consult your vehicle’s manual for specific instructions. With a little patience and effort, you’ll have your heater working like new in no time.

Credit: www.amazon.com
Step-By-Step Guide: Replacing Temperature Control Unit
Replace the temperature control unit in your 1998 Chevy Silverado with this step-by-step guide. Resolve any heater control problems efficiently with these simple instructions.
Gather Necessary Tools And Replacement Parts:
- Phillips head screwdriver
- Trim panel removal tool
- Wire harness disconnect tool
- Replacement temperature control unit
To successfully replace the temperature control unit in your 1998 Chevy Silverado, you will need a few tools and replacement parts. Ensure that you have the following items on hand before you begin the process:
- Phillips head screwdriver: This tool will be essential for removing the screws securing the dashboard trim panels.
- Trim panel removal tool: Use this tool to carefully pry off the dashboard trim panels without damaging them.
- Wire harness disconnect tool: This tool will help you disconnect the electrical connections from the temperature control unit without any hassle.
- Replacement temperature control unit: Make sure you have the new temperature control unit ready to be installed after removing the old one.
Disconnect The Negative Battery Cable:
- Locate the negative battery terminal.
- Use a wrench or socket to loosen the nut securing the negative cable.
- Carefully remove the negative battery cable from the terminal.
Before you begin working on the temperature control unit, it is crucial to disconnect the negative battery cable. Follow these steps to do so:
- Locate the negative battery terminal, which is typically marked with a “-” symbol.
- Using a wrench or socket, loosen the nut securing the negative cable to the terminal.
- Once loose, carefully remove the negative battery cable from the terminal to ensure no electrical current flows through the system.
Remove The Dashboard Trim Panels:
- Gently pry off the dashboard trim panels using a trim panel removal tool.
- Set aside the removed panels in a safe place.
- Keep track of any screws or clips that may come loose during this process.
Now that the negative battery cable is disconnected, you can proceed with removing the dashboard trim panels. Follow these steps:
- Using a trim panel removal tool, gently pry off the dashboard trim panels, starting from the edges and working your way around.
- Set aside the removed panels in a safe place to avoid any damage.
- Be sure to keep track of any screws or clips that may come loose during this process, as they will be needed for reassembly later on.
Disconnect The Electrical Connections:
- Identify the electrical connections connected to the temperature control unit.
- Use a wire harness disconnect tool to safely disconnect the electrical connections.
- Take note of the specific connections and their positions for easier reconnection later.
Before removing the temperature control unit, you need to disconnect the electrical connections. Here’s how you can do it:
- Identify the electrical connections that are connected to the temperature control unit. These connections are usually located at the rear of the unit.
- Utilize a wire harness disconnect tool to safely disconnect the electrical connections without causing any damage.
- As you disconnect each connection, take note of the specific connections and their positions. This will help you during the reconnection process later on.
Remove The Temperature Control Unit:
- Locate the temperature control unit, typically positioned in the center of the dashboard.
- Unscrew the mounting screws securing the temperature control unit.
- Carefully pull the unit out, ensuring not to damage any surrounding components.
With the electrical connections disconnected, you can now proceed to remove the temperature control unit itself. Follow these steps:
- Locate the temperature control unit, which is usually positioned in the center of the dashboard.
- Unscrew the mounting screws that secure the temperature control unit in place, using a Phillips head screwdriver.
- Carefully pull the temperature control unit out, ensuring that you do not damage any surrounding components in the process.
Install The New Temperature Control Unit:
- Take the new temperature control unit and position it properly in the dashboard.
- Secure the unit in place by tightening the mounting screws.
- Connect the electrical connections to their respective ports on the new unit, ensuring a snug fit.
Now that the old unit is removed, it’s time to install the new temperature control unit. Follow these steps:
- Take the new temperature control unit and position it properly in the dashboard, aligning it with the mounting holes.
- Secure the unit in place by tightening the mounting screws using a Phillips head screwdriver.
- Connect the electrical connections to their respective ports on the new unit, ensuring a snug and secure fit.
Reassemble The Dashboard Trim Panels:
- Place the previously removed dashboard trim panels back in their original positions.
- Gently press on the panels until they snap securely into place.
- Ensure that all clips and screws are properly tightened for a seamless fit.
With the new temperature control unit in place, it’s time to reassemble the dashboard trim panels. Follow these steps:
- Take the previously removed dashboard trim panels and position them back in their original locations, aligning the clips and screw holes.
- Gently press on the panels until they snap securely into place, ensuring all edges are flush with the surrounding areas.
- Check that all the clips and screws are properly tightened to ensure a seamless fit of the dashboard trim panels.
Reconnect The Negative Battery Cable:
- Locate the negative battery terminal.
- Reattach the negative battery cable to the terminal.
- Use a wrench or socket to tighten the nut securing the cable connection.
Now that you have reassembled the dashboard trim panels, it’s time to reconnect the negative battery cable. Follow these steps:
- Locate the negative battery terminal, which is typically marked with a “-” symbol.
- Reattach the negative battery cable to the terminal, ensuring a snug fit.
- Using a wrench or socket, tighten the nut that secures the cable connection to the terminal, ensuring a secure electrical connection.
By following this step-by-step guide, you can successfully replace the temperature control unit in your 1998 Chevy Silverado. Remember to take your time, be cautious, and refer to your vehicle’s manual for any specific instructions or diagrams. Enjoy the improved functionality of your heater control system!
Step-By-Step Guide: Repairing Blend Door Actuator
Learn how to repair the blend door actuator in your 1998 Chevy Silverado and solve your heater control problems with this step-by-step guide. Follow these simple instructions to get your heater working like new again.
If you’re experiencing heating problems in your 1998 Chevy Silverado, it’s possible that the blend door actuator is faulty. The blend door actuator controls the temperature and airflow inside your vehicle, so it’s important to address any issues promptly. In this step-by-step guide, we’ll walk you through the process of repairing the blend door actuator to restore proper functionality to your Silverado’s heating system.
Gather Necessary Tools And Replacement Parts:
Before you begin the repair process, make sure you have all the necessary tools and replacement parts. Here’s a list of what you’ll need:
- Screwdriver set
- Socket wrench
- Replacement blend door actuator
- Electrical tape
- Plastic pry tool
Locate The Blend Door Actuator:
To access the blend door actuator, you’ll need to remove the lower dashboard panel. Here’s how you can locate it:
- Locate the lower dashboard panel on the passenger side of your Silverado.
- Use a screwdriver to remove the screws securing the panel in place.
- Carefully pry off the panel using a plastic pry tool.
Remove The Faulty Blend Door Actuator:
Once you’ve located the blend door actuator, you can proceed with its removal. Follow these steps:
- Disconnect the electrical connector from the actuator.
- Remove the screws or bolts securing the actuator to the blend door.
- Gently pull the actuator away from the blend door, taking care not to damage any surrounding components.
Install The New Blend Door Actuator:
Now that you’ve removed the faulty blend door actuator, it’s time to install the new one. Here’s what you need to do:
- Position the new actuator onto the blend door, aligning it with the mounting holes.
- Secure the actuator in place with screws or bolts.
- Reconnect the electrical connector to the new actuator.
Test The Functionality:
After installing the new blend door actuator, it’s crucial to test its functionality. Here’s how you can do it:
- Start your Silverado’s engine and switch on the heating system.
- Adjust the temperature controls to ensure the blend door actuator moves smoothly.
- Verify that the air coming out of the vents matches the desired temperature.
By following this step-by-step guide, you’ll be able to repair the blend door actuator in your 1998 Chevy Silverado and restore proper heat control to your vehicle. Remember to exercise caution and refer to your vehicle’s manual for additional assistance, if needed.
Stay warm and enjoy your comfortable rides!
Step-By-Step Guide: Flushing And Replacing Heater Core
Learn how to flush and replace the heater core in your 1998 Chevy Silverado to tackle those pesky heater control problems. This step-by-step guide will help you resolve the issue and keep your vehicle’s heating system running smoothly.
Is your 1998 Chevy Silverado experiencing heater control problems? One common culprit for ineffective heating is a clogged or malfunctioning heater core. Flushing and replacing the heater core can help restore its functionality. Follow this step-by-step guide to tackle this issue and get your Chevy Silverado back to providing cozy warmth.
Gather Necessary Tools And Replacement Parts:
To successfully replace the heater core, you will need the following tools and replacement parts:
- Socket wrench set
- Screwdriver set
- Pliers
- Replacement heater core
- Coolant
- Coolant catch pan
Disconnect The Negative Battery Cable:
Begin by disconnecting the negative battery cable to ensure your safety and prevent any electrical mishaps during the process.
Drain The Coolant From The Radiator:
Place a coolant catch pan under the radiator drain plug and carefully loosen the plug to drain the coolant. Ensure you dispose of the coolant properly, as it is toxic to the environment.
Remove The Heater Hoses From The Heater Core:
Locate the inlet and outlet heater hoses connected to the heater core. Use pliers to loosen the hose clamps and detach the hoses from the core, taking care not to damage them.
Remove The Heater Core:
Locate the heater core assembly beneath the dashboard on the passenger side of the vehicle. Carefully remove any surrounding panels and screws necessary to access the heater core. Once exposed, remove the mounting bolts or screws and gently pull the heater core out of its housing.
Install The New Heater Core:
Take the replacement heater core and insert it into the housing. Secure it in place with the mounting bolts or screws.
Reconnect The Heater Hoses:
Reattach the heater hoses to their respective inlet and outlet connections on the new heater core. Tighten the hose clamps securely using pliers.
Refill The Coolant:
Using the appropriate type of coolant for your Chevy Silverado, refill the radiator with the recommended amount of coolant. Ensure you follow the manufacturer’s instructions for the proper coolant-to-water ratio.
Reconnect The Negative Battery Cable:
Finally, reconnect the negative battery cable to its terminal, ensuring a secure connection. Double-check all your work and ensure everything is properly tightened and reassembled.
By following these step-by-step instructions, you can successfully flush and replace the heater core in your 1998 Chevy Silverado. This process should help resolve any heater control problems you may be experiencing and bring back optimal heating performance to your vehicle.
Stay warm on the road ahead!
When To Seek Professional Help
Experiencing issues with your 1998 Chevy Silverado’s heater control? If so, it may be time to seek professional help for specialized solutions. Ensure optimal performance and a comfortable driving experience with the assistance of a qualified technician.
If you’re experiencing issues with your 1998 Chevy Silverado heater control, there are certain situations where seeking professional help is recommended. These include:
Complex Electrical Issues:
- Troubleshooting electrical problems can be challenging, especially if you lack technical expertise.
- Professional technicians have the necessary tools and knowledge to diagnose and fix complex electrical issues.
- They can efficiently identify any wiring faults or malfunctions within the heater control system.
Extensive Hvac System Repairs:
- If your heater control problems are a result of extensive repairs needed for your HVAC system, it may be best to consult a professional.
- HVAC systems are intricate and require specialized skills to repair or replace components.
- Professionals can assess the overall condition of your HVAC system and provide the most effective and long-lasting solutions.
Lack Of Mechanical Knowledge:
- If you have limited mechanical knowledge or experience with automotive systems, attempting repairs on your heater control might lead to unintended consequences.
- Professionals have the expertise and experience to handle repairs safely and correctly, preventing further damage or accidents.
- They can also provide guidance and advice on proper maintenance techniques to prolong the lifespan of your heater control system.
Remember, it’s important to prioritize your safety and the functionality of your vehicle. Seeking professional help when encountering these specific situations can save you time, money, and potential frustrations.
Choosing A Qualified Hvac Professional
Having trouble with the heater control in your 1998 Chevy Silverado? Make sure to choose a qualified HVAC professional for a solution that is reliable and efficient.
Finding a qualified HVAC professional to fix your 1998 Chevy Silverado heater control problems is crucial for a successful and long-lasting repair. With so many options out there, it can be overwhelming to know which one to choose. To help you make an informed decision, consider the following tips:
Check For Certifications And Licenses:
- Look for technicians who hold relevant certifications and licenses. This ensures their expertise and adherence to industry standards. Some certifications to look out for include NATE (North American Technician Excellence) and EPA (Environmental Protection Agency) certifications.
- Certified technicians undergo rigorous training and testing, guaranteeing their proficiency in handling HVAC repairs, including heater control problems in your Chevy Silverado.
- By hiring a certified professional, you can have peace of mind that the repair job will be carried out by someone who has met the necessary qualifications.
Read Customer Reviews And Ratings:
- Customer reviews and ratings provide valuable insights into the quality of service provided by HVAC professionals.
- Look for online platforms, such as Yelp or Google, where previous customers leave feedback about their experiences.
- Pay attention to both positive and negative reviews to gain a comprehensive understanding of the technician’s expertise, professionalism, and customer satisfaction levels.
- Consider the overall rating, but also assess the specific comments regarding heater control problems to ensure the technician has experience in addressing similar issues.
Get Multiple Quotes For The Repair Job:
- It’s always a good idea to obtain multiple quotes from different HVAC professionals before making a decision.
- Request quotes specifically for the heater control problems in your 1998 Chevy Silverado.
- Be sure to provide accurate details about the issues you are experiencing to ensure the quotes are as precise as possible.
- By comparing quotes, you can gain a better understanding of the average cost and the range of services offered by various professionals.
Choosing a qualified HVAC professional for your 1998 Chevy Silverado heater control problems is essential for a smooth and effective repair. Take the time to check for certifications and licenses, read customer reviews, and gather multiple quotes. By doing so, you can ensure that your repair job is handled by a qualified technician who will get your heater control system back in working order.
Frequently Asked Questions On 1998 Chevy Silverado Heater Control Problems
Why Is My Chevy Silverado Heater Not Blowing Hot Air?
Your Chevy Silverado heater may not be blowing hot air due to a possible issue with the thermostat or a malfunction in the heating system. Check for any coolant leaks or a faulty heater core valve.
Why Does My Heater Only Work When Accelerating Silverado?
Your Silverado heater may only work when accelerating due to a problem with the heater core or a restricted coolant flow.
Why Does My Chevy Truck Lose Power When Accelerating?
Your Chevy truck may lose power when accelerating due to issues with the fuel system, spark plugs, or air intake.
Q: What Are Common Heater Control Problems In A 1998 Chevy Silverado?
A: Common heater control problems in a 1998 Chevy Silverado include a malfunctioning blower motor, stuck or broken blend door, and faulty temperature control. These issues can result in insufficient heat, inconsistent temperature, or no airflow at all. It’s best to consult a professional to diagnose and fix the problem.
Conclusion
The heater control problems in the 1998 Chevy Silverado can be frustrating, but with the right knowledge and approach, they can be resolved. By understanding the different issues that may arise, such as a malfunctioning control panel or a faulty blend door actuator, you can tackle the problem head-on.
It’s important to regularly maintain and check your heating system to prevent any potential problems from escalating. If you do encounter issues, it’s best to consult a professional who can accurately diagnose and fix the problem. Remember to stay vigilant for any signs of trouble, such as a lack of heat or strange noises, and address them promptly.
By keeping your heater control in good working condition, you can ensure a comfortable driving experience in your 1998 Chevy Silverado.
Hi, my name is Michel Luther. I am the owner of smartautohq.com website. I have been working in the automotive industry, especially in the car part nearly 7 years. So, I want to help you with this matter whatever I know